
News
Hacking Serato DJ’s MIDI Mapping: Jogwheels, Touchstrips, and Modifiers
Apr
From the early years of Scratch Live to the current Serato DJ Pro, Serato has been relatively secretive about the MIDI implementation of their software. Though the software allows the use of any MIDI device, many features are only available on certified controllers. You can’t map your own jogwheels, functions like needle search / slicer are restricted, and there are no shift control layers or modifiers to create advanced mappings. In today’s tutorial, DJTT contributor Teo Tormo shares secrets for writing custom MIDI mappings for Serato DJ – including jogwheels, modifiers, and more.
If you manually write a MIDI mapping for Serato DJ, it unlocks many more features for any MIDI controller. The problem is that there is no manual for this (Serato employees probably have a top secret one), so you don’t know the commands or the complete syntax and variables.
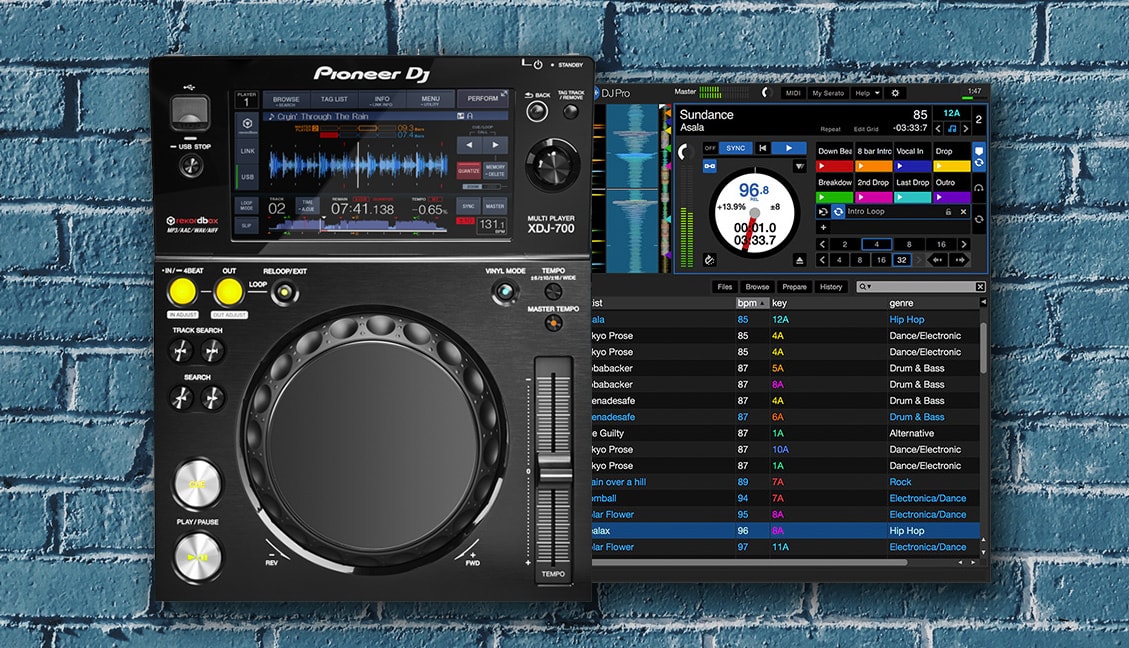
To learn more, I started my own research on forums and websites. I’ve downloaded many mappings others have done (Radikarl might be the user who has contributed the most to the Serato users community), and found some code for mapping the jogwheels and for using modifiers. In today’s article, I share the Serato DJ MIDI mapping secrets I’ve found – and in the video, I demo using that code with a Pioneer DJ XDJ-700 (one of the few players from Pioneer that is not Serato certified).
Editor’s Warning: Making your own custom mappings or using non-certified gear is really fun, but if you break something, it’s your own fault. We recommend not using these mapping tricks in real word situations where your reputation is on the line – this is primarily for fun home experimentation!
Before the text explanations, watch the step by step video tutorial below for mapping jogwheels, a touchstrip/needlesearch function, and creating a modifier for assigning more than one function to a control. The necessary XML code is at the end of the article, so after watching the video you can download it and use it for your own mappings.
Author’s note: Please excuse my terrible English pronunciation! This is the first video I’ve ever recorded in English.
- Why do you change the XDJ-700 to channel 1 for the MIDI mode at the start of the video? Because the XML code for copy/paste is made to work with a controller using channel 1. You can see in the code that always is
channel="1" - Can I use another MIDI channel? Yes – but check the concordance between the channel set in the code and the channel set in the player.
- Can I use this for more than one player or controller? Yes, but every device must be setup to use a different MIDI channel, and you must copy/paste the code for every player with the right MIDI channel. Serato does not discriminate the MIDI controller that is sending the messages, so you have to use different channels for every MIDI controller you use.
- Which part of the video shows the moment you get the MIDI note on message for the modifier? None.I forgot to record that. For the modifier/shift button I use the Vinyl Mode button of the XDJ player. The screen can’t be used for that because it is not multitouch capable, and the hotcue button was assigned to one screen button.
- Can this be done on Windows? Sure. Komodo Edit, Midi Monitor and Midi Translator are all available on Windows. You can replace Hex Fiend with HxD Editor. The XML files are the same and they are inside the Serato library folder.
- Serato is changing my mapping after adding some more things within the software, what is happening? As I explain in the video, first you have to make the regular mapping –the functions Serato allow to map–, and after that copy/paste all the additional code, or write your own. That’s because every time you press “Save” on the MIDI mapping options within Serato, the software checks all the code and changes things, specially the ones related to jogwheels. It seems that since version 1.7.2 Serato uses a different syntax for some things, but has a legacy compatibility with the old syntax. The code provided here for the jogwheels is made with the old syntax.
A trick for not having problems with unwanted changes is to change the XML file with the mapping to read only. Serato will not have a problem loading a read only mapping. - Can I try with more functions? I have found that
touch_strip_scrubcan also be used with touchstrip controls. It works in a similar way to the Novation Twitch or the Kontrol D2. I’ve also found some commands for the slicer function likeslicer_ enabler,slicer_domain_valuesandslicer_domain_sizeorslicer_triggerbut no luck making it work so far. The same withfilter_roll_touchandfilter_roll_knob. - Why don’t you talk about lighting? The XDJ-700 has no MIDI input port – an intentional limitation set to force developers to ask Pioneer for HID control access – so you can’t control the lights of buttons.
- Is there any way to control what the XDJ-700 screen displays? How can I have a better resolution in the pitch fader? No way, the screen only reacts to HID commands. To have access to HID, Pioneer must give you a sequence of commands that grants you the access. The pitch fader can’t send high resolution MIDI messages, so what you got is what you have.
Basic Rules of Serato DJ MIDI Mappings:
If you look carefully at a Serato DJ mapping file – even without knowing anything about XML- you’ll find:
- Every mapping starts with
<midi app="[version number]">and ends with</midi>, you can also start a mapping with just<midi>. Remember the golden rule that when using a markup language you always have to close every tag. A XML editor like Komodo will help you a lot because it checks if the code is properly written –only checks XML rules, not Serato MIDI mapping specific rules– - Every definition of a mapped control starts with <control followed by the channel number, type of control –control change or note on– and the decimal number of the control. After that we have the <userio usually followed by the direction of the message, “click” for a MIDI input message, and “output” for a MIDI out control for controlling the light of a button or indicator.
- In the following line we usually have the markup with the name of the mapped function, the variables “deck set”, “deck ID” and “slot ID” appears. I’m not sure about the first one, because I always find that the value is “default”, maybe it’s the value for a two deck config –I only have hardware for two decks in Serato–. “Deck ID” refers to the number of the deck, starting with 0 for deck 1. “Slot ID” usually shows a value different to 0 when you are mapping a function with several pre defined values, like the autoloop size.
- In the <translation line the most important variable is “behaviour”, the “explicit” value is for a direct action of a button or moving control, the other usual value is “toggle” used for buttons that change the state of the function after each push –turn an effect on or off, enable or disable the slip mode–.
- If you want to use modifiers, first you have to create one –see the code– or as many you need, and after that, you can assign several more than one function to a control. For each function you have to use a
<case>tag and the<condition>tag for each modifier value you want to use. You can create as many cases as you want, for example, this is used for pads with five or six different functions which are selected using a set of buttons on top of the pads –the typical set of 8 pads per deck that every controller has now–.
The Code
Here’s the most interesting part of the article: the XML code. You just have to copy and paste it in your mapping, remembering to replace the CC and Note On numbers with the right ones for your controller. Also, remember to respect the MIDI markups at the beginning and the end of the XML mapping file. Another thing yo’ll have to change for your controller is the “range” variable in the jogwheel code. In the video and in the code below, the min and max range is 1536 – but why? I can’t give a precise answer for that.
In some mappings I have found during my research on this topic, usually the range is the number of messages that the wheel sends in one turn, and I found mappings with values of 1500, 450, 1800… but with the XDJ-700 I discovered that the jogwheel only sends a max of 128 messages in one turn. I tried with a value of 128 in the mapping, but the result was terrible, so I tried multiples of that value. Finally the value that worked best was 1536, that it’s 128 times 12.
Jogwheel
<control channel="1" control_type="CC" event_type="Control Change" control="16" data_type="Relative Binary Offset">
<userio event="click">
<platter_move deck_id="1">
<translation>
<range in_min="-1546" in_max="1546" out_min="-1" out_max="1" />
</translation>
</platter_move>
</userio>
</control>
<control channel="1" control_type="CC" event_type="Control Change" control="48" data_type="Relative Binary Offset">
<userio event="click">
<platter_move deck_id="1">
<translation>
<range in_min="-1546" in_max="1546" out_min="-1" out_max="1" />
</translation>
</platter_move>
</userio>
</control>
<control channel="1" event_type="Note On" control="32">
<userio event="click">
<platter_touch deck_set="Default" deck_id="0" slot_id="0">
<translation action_on="any" behaviour="explicit"/>
</platter_touch>
</userio>
</control>
Touchstrip / Needlesearch
<control channel="1" control_type="CC" event_type="Control Change" control="28">
<userio event="click">
<touch_seek deck_set="Default" deck_id="0" slot_id="0">
<translation action_on="any" behaviour="explicit"/>
</touch_seek>
</userio>
</control>
Remember that you can change this code and use touch_strip_scrub instead of touch_seek .
Modifier
<control channel="1" event_type="Note On" control="18">
<userio event="click">
<modifier_1>
<translation action_on="any" behaviour="explicit"/>
</modifier_1>
</userio>
</control>
Set/Delete First Hotcue
<control channel="1" event_type="Note On" control="24">
<case>
<condition>
<modifier_1 deck_set="Default" deck_id="0" slot_id="0" operator="equal" cmp_value="off"/>
</condition>
<userio event="click">
<cue_point deck_set="Default" deck_id="0" slot_id="0">
<translation action_on="any" behaviour="explicit"/>
</cue_point>
</userio>
</case>
<case>
<condition>
<modifier_1 deck_set="Default" deck_id="0" slot_id="0" operator="equal" cmp_value="on"/>
</condition>
<userio event="click">
<cue_point_delete deck_set="Default" deck_id="0" slot_id="0">
<translation action_on="any" behaviour="explicit"/>
</cue_point_delete>
</userio>
</case>
</control>
Do you want to be a MIDI mapping hacker?
Serato has never released detailed information about how their XML mapping works, but you can find inside the software a list of commands and variables that in some way must work. This means that hungry MIDI mappers are free to use the trial/error method and share your results with the world.

Where’s that list? Right-click on the Serato app icon, choose “Show package contents”, open the Contents/MacOS folder, open the real Serato DJ Pro executable with a hex editor (my favorite is Hex Fiend). Then try to search (Command + F) for words like “seek”, “platter”, “touch”, or “enable”, and you will find a lot of commands to try. Maybe you’ll be the next person to show the world something new about Serato MIDI mapping!