
News
How To Use Any MIDI Controller With WeDJ + Cross DJ iOS Apps
Nov
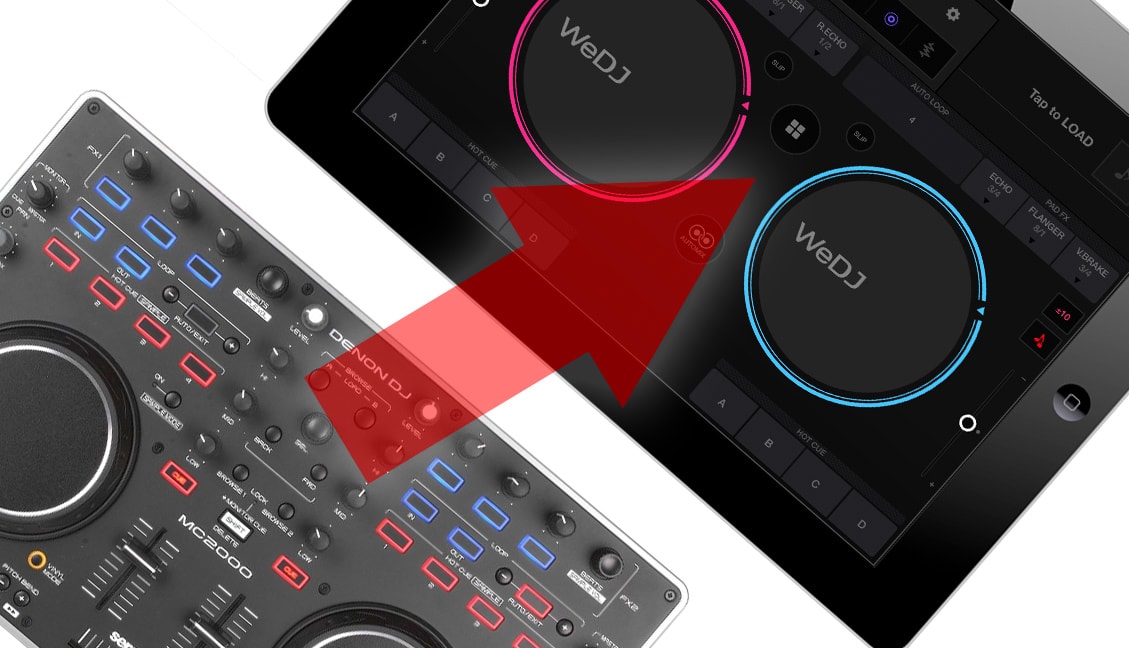
There are great DJ apps for iOS that let you connect a controller and use your iPad as a complete DJ system. Unfortunately, some of those apps only allow you to use specific controllers. Today, guest contributor Teo Tormo explains how to get around these restrictions and use whatever MIDI controller you want with Pioneer DJ’s WeDJ and Mixvibes’ Cross DJ.
WeDJ and Cross DJ only allow DJs to use a very limited list of controllers. This is often because of commercial settlements, or because the same brand that develops the app also sells the controller. But if you don’t have one of the “allowed controllers” there is a way to fool the apps and make them believe that one of those controllers is connected!
Editor’s note: this is a complicated but fun adventure in MIDI mapping and forwarding! If you’re lost or have questions, pop into the comments.
What You’ll Need:
If you want to use any controller with the WeDJ or Cross apps, you’ll need:
- A class compliant MIDI controller: Don’t know if your controller is class compliant? Check the manual. Also, usually class compliant devices don’t need drivers when used with macOS.)
- Official Apple USB to lightning adapter*: commonly known as “Camera Connection Kit” or “CCK”. You can use the new one that comes with USB 3 and an additional power port (very useful with some controllers that need additional power) or the old one with just a USB 2.0 connector.
- Midiflow iOS app*: You’ll have to buy the app and one in-app purchase, the “Controller Remapping” add-on
- The list of MIDI messages of the DDJ-WeGo3 and DDJ-SB controllers from Pioneer, you can download them here and here, respectively.
- It would be also useful to have your controller’s MIDI message list, but this is not required.
* Why the CCK adapter? Many controllers “allowed” by these apps have direct compatibility with iOS. Some use special cables, in which case the app has a kind of built-in driver to support it. But in the end, all of them communicate with the app using standard MIDI commands, there is no HID protocol or anything special. Using the CCK adapter you can connect any MIDI class compliant controller, it will be recognized by iOS, and the controller will send standard MIDI commands.
If your controller does not use a power adapter (USB powered only), it might need more power than the one provided by the lightning port of the iPad. In that case, you’ll need the new CCK with the additional power port and connect the iPad charger or a USB battery pack Another solution for power problems (and that one always works), is to connect the controller to a powered hub, then connect that to the iPad with the CCK.
**Why the Midiflow app? Midiflow is an iOS app that allows to create virtual MIDI ports (and name them whatever you want) that can be seen by any other app, and also allows to patch virtual and real MIDI connections and remap MIDI commands between those connections. The app has some resemblance with Bome MIDI Translator, but made for iOS, and it’s also the key of this “hack”.
What’s The Plan?
It’s simple. We’ll create a virtual MIDI port with Midiflow with the same name that WeDJ or Cross expect to detect when looking for a connected compatible controller. That will be enough to make the app think the real compatible controller is connected.
After that, just remap the incoming MIDI messages from your controller into the MIDI messages that a compatible controller would send, and redirect all the messages to the new virtual port. You can also remap the outgoing messages from the app for visual feedback like LEDs.
The whole process is a bit long, but fairly easy to do once you understand how the whole thing works. I’ve completely remapped a Denon MC2000 and now it works like a charm with WeDJ. Here’s proof:
We DJ with Denon MC2000
Yes, you can use any controller you want with WeDJ or Cross DJ on iOS – learn how on the DJTT blog!
Posted by DJ TechTools on Wednesday, November 29, 2017
How To Set Things Up
First, connect your controller to the iPad using the CCK. Wait to see if the controller turns on and is correctly detected by iOS. If no error message pops up in the iPad, everything should be OK. If you have an error message about power consumption from the device, you need to fix that first.
Once the controller is on and connected, open Midiflow. The first time opening the app, it will look like this:

Tapping the “+ Add” label will create a “routing”. In Midiflow, a routing is formed by a MIDI in port, a list of modifiers (instructions of “what to do” with concrete MIDI messages) and a MIDI out port. Next up:
- Tap the upper “+” icon and a menu with a list of physical and virtual input ports will pop up. Tap in the physical port of your DJ controller to select it as the MIDI in port of the routing.
- Now tap in lower “+” icon and in the end of the menu select “Add virtual input”. In the window that will pop up, just write PIONEER DDJ-WeGO3 (use this exact upper and lower case and spaces between words).
- After adding the new virtual output, tap it in the menu to select it.
If everything is right, when opening WeDJ or Cross DJ, the apps will react as if a DDJ-WeGO3 were plugged into the iPad .In WeDJ the interface should change from this:
To this:

And in Cross DJ, a message will note that a DDJ-WeGO3 is detected and ready to use:

Keep in mind: the DDJ-WeGO3 is a pretty basic controller, but is compatible with both WeDJ and Cross DJ. If you are using Cross DJ and want additional controls for the filter and FX, you can fool that app by naming the Midiflow virtual port as PIONEER DDJ-SB – but you’ll instead have to use the MIDI messages list of that controlle. In this tutorial we explain how to remap the messages for the DDJ-WeGO3 virtual port option.
Now To Remap Some Buttons!
Once everything is connected, it’s time to convert the MIDI messages from your controller into the MIDI messages a DDJ-WeGO3 would send. Let’s start by remapping the Play button on the left deck. This is easy – and it’s a good example for any other button:
- First go to Midiflow and activate the Midi Monitor by tapping on “Midi Monitor: Notes & CTRLS”
- Open the Config menu on the upper right corner of the app and in the Midi Monitor options choose “Hex” (believe me, it’s much more easy to do this in hexadecimal)
- Now press the left deck Play button of your controller and watch the two messages that will appear on the Midiflow screen:

The MC2000 that I’m using sends two MIDI messages when pressing Play. The one starting with 9 is a note on message and the one starting with 8 is a note off message (sent when the button is released). The second number, 0, is the number of the channel. When talking about hex MIDI messages, the channel number is the result of adding 1 to the second cypher of the message, so 0+1=1. So this message is sending the note on using channel 1.
43 is the key of the note. If you check this MIDI data conversion chart, 43 corresponds to G4 in a piano keyboard.
40 and 00 are velocity levels. The MC2000 I’m using is a bit “special”, because usually the note on messages from DJ controllers send 7F (127 in decimal) as velocity value; note off values use the common 00 value for that.
Open the list of MIDI messages for the DDJ-WeGO3 (linked earlier). Check the exact message that the Pioneer controller sends when you press play: 9n 0B dd
The message starts with 9, so it’s also a note on message, the “n” is a variable that must be set to 0 for channel 1 and 1 for channel 2, 0B is the key (exactly B-1 on a piano keyboard) and “dd” is also a variable for the velocity value. A correct MIDI message from the left deck play button of the DDJ-WeGO3 would be 90 0B 7F for the note on, and the note off would be 80 0B 00, and also 90 0B 00. Here’s how to map that:
- In Midiflow tap on the “+” icon of the previously created routing. In the pop up, scroll down to “Controllers” and tap on “Add Remapping”.
- Scroll down and tap “Message (e.g. SysEx)”, in the pop up type 90 43 40 and tap Done. The message will be added, then tap “Done” in the upper right corner of the “Remap Controller” menu.
- Scroll down to “Outgoing controller” and tap on “MSB: CC0 (Bank Select)”.
- Scroll down again to “Message” and type 90 0B 7F. You have just mapped the note on message.
- Now repeat the process with the note off message. If you have done it in the right way you will be able to start and stop the loaded track in the left deck using the Play button of your controller. (Wow!)
If you’re using WeDJ, you only have to remap the note on messages (except for the FX buttons, those need the note off message to be remapped as well). If you are using Cross DJ, you’ll need to to remap every note on and note off message. You can remap every button using the above explanation and a careful hand. Be careful with some functions! For example, FX buttons on the DDJ-WeGO3 use specifically channels 5 and 6 (messages starting with 94 and 95). I recommend to create different routings for the messages of every channel, it is better to classify all the remapings that way.
Turning On Lights
Both WeDJ and Cross can send MIDI to your controllers for visual feedback, but you have to first convert the incoming messages from the app. Here’s how:
- First, create a new routing instance – tap “+Add”
- in the new routing, set a new MIDI input using a virtual input port with the same name as the MIDI out from earlier: PIONEER DDJ-WeGO3.
- As MIDI out for the routing, set the MIDI input of your controller. If you play or pause a track, you’ll see in the MIDI monitor of Midiflow new messages in the translator, that messages are the ones that control the lights.

- On the second page of the MIDI messages list of the DDJ-WeGO3 (first “Indicator name” block) you’ll find that the message that lights the Play button of the left deck is 90 0B 7F, and the one that turns off the light is 90 0B 00, same messages than before. The other messages you’re seeing are for lighting the jogwheel and Cue button.
- Not every controller has the same MIDI message assigned for the action and the lighting, so check the MIDI messages list for your controller to find the right message for lighting your Play button. On my MC2000, the message for turning on is B0 4A 27, and for turning off is B0 4B 27 (Those messages start with B, more on that later…)
- In the new routing, now add two new remappings using the same method as before. Use incoming messages 90 0B 7F and 90 0B 00, and the right outgoing messages for your controller.
Remapping knobs and faders
Knobs and faders use different kinds of MIDI messages called “continuous controls” – abbreviated as CC. Those messages:
- start with B
- then the channel number (0, 1, 2… remember to add 1 to get the real channel)
- after that comes the CC number – a two cypher hex number (from 00 to 7F)
- finally the control value (the absolute position of the control) with two more cyphers that can range from 00 to 7F.
Usually a MIDI controller with faders and knobs uses a different CC for each physical control and it has 128 steps, but a lot of newer controllers use a combination of two CCs for achieving a higher resolution of 16384 steps.

The DDJ-WeGo3 is one of those controllers with higher resolution, but don’t worry – Midiflow is ready for that.
In this example, we’ll remap the left deck volume. The controller sends messages using CC 13 and CC 33 (in hexadecimal, in decimal are 19 and 51), and channel 7. When using two CCs for high resolution, the data from the first one is known as MSB (most significant bit) and the data from the second one is LSB (least significant bit). The MC2000 I’m using sends the data of the left deck fader only using CC 05, channel 1, so I’ll map it like this:
- Create a new routing instance. Keep in mind that now we are remapping CCs, not note on messages, and the lists of CC numbers will be shown in Midiflow using decimal, not hex.
- Delect MC2000 as input and the virtual DDJ-WeGO3 as output.
- Scroll down to Controllers and tap “Add remapping”. Tap “Show all” under the predefined list of CCs.
- Tap CC5. The menu will send you back.
- Scroll down to Outgoing Controller and tap CC5 to change it, in the next menu scroll down to “Show all” and tap CC13. The menu will send you back.
- Now select the MSB+LSB option of Precision. A second CC will appear under CC19 labeled as LSB, and it will be automatically set to CC51. Tap Apply Modifiers in the upper left corner.
- Now we have to remap the out channel, scroll down to Remap Channel and set it to 7. Done. Remember that you can add more remappings to this routing only if the output uses channel 7 – the channel remapping affects every remap in the routing. If you need to remap CCs to another channels, just create more routings with different channel remapping.
Now To Map Jogwheels
You have two map two different controls for the jogwheel: the touch sensor of the top (a note on/off message) and the rotation (a CC message). The jogwheels of the DDJ-WeGO3 use the same MIDI channel as the buttons for their decks. This means you can add the remaps to the same routing we created at the beginning of the tutorial. Here’s how:
- Look for the note on / off messages your controller sends when you just touch the capacitive upper part. On the MC2000, the messages are 90 51 7F and 80 51 00. The DDJ-WeGO3 uses the messages 90 36 7F and 90 36 00 for that. Add two remaps for the note on / off messages.
- The DDJ-WeGO3 uses the CC34 and channel 1 for the left jogwheel rotating messages, but my MC2000 uses CC81. I explained the method for remapping CCs in the last section – use it!
- If you remap both controls correctly, you will be able to pitchbend on the outside of the jogwheel, and scratch if you press the top of it and rotate.
The list of MIDI messages for the DDJ-WeGO3 shows a different message for rotating the jogwheel on the outside (pitchbend) but it is not essential to map it.

What About Audio?
There is no problem setting the outputs to your controllers interface. Apparently WeDJ and Cross DJ don’t restrict soundcards by their interface name. Both apps only look for the name of the MIDI ports to activate the control functions. So, simply go to the preferences of the chosen app and select the right ouputs for the main out and the headphones.
 That’s’s all! With the above instructions, you should be able to remap almost any controller and make it work with WeDJ and Cross DJ. Maybe the most important thing you have to remember is that you only need a virtual port created with Midiflow (the only iOS app I’ve found that can do this) with the same name of a compatible controller to fool both apps, everything else (the remapping) is just a question of time and patience. Have fun – and let me know in the comments if you have questions!
